Moving out can be a stressful process, but a well-organised approach is your best defence for getting your full security deposit back. In British Columbia, the Residential Tenancy Act (RTA) outlines the rights and responsibilities of both tenants and landlords. According to a 2023 report from the Tenant Resource & Advisory Centre (TRAC), disputes over security deposits remain one of the most common issues brought before the Residential Tenancy Branch, highlighting the financial risks for tenants who miss crucial steps.
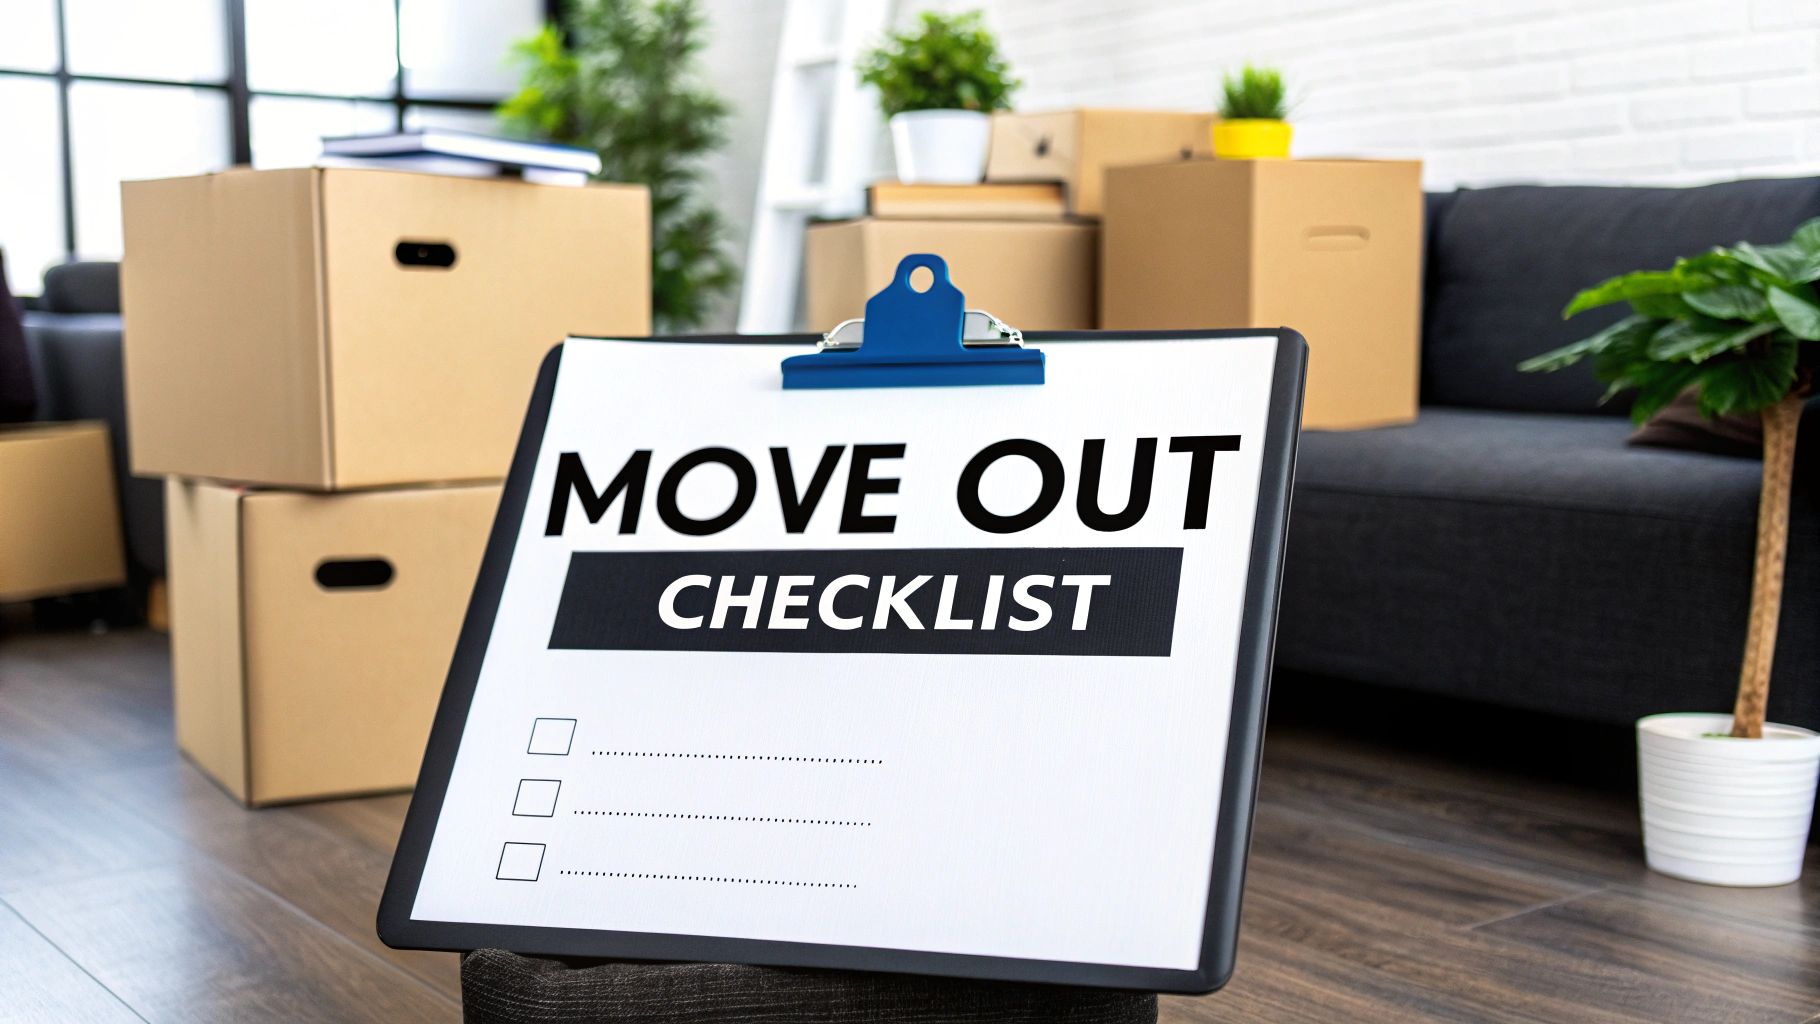
This tenant move out checklist is designed to guide you through every critical task, from initial planning to the final key handover. By following these 8 steps, you can confidently navigate the move-out process, avoid common pitfalls, and ensure a smooth transition. We'll provide actionable advice, referencing regulations and best practices relevant to tenants in the Fraser Valley, Maple Ridge, and beyond, helping you leave your rental on the best possible terms and protect your financial interests.
1. Provide Proper Written Notice
The first, non-negotiable step in any successful tenant move out checklist is providing your landlord with formal, written notice. This isn't just a courtesy; it's a legal requirement under British Columbia's Residential Tenancy Act that protects your rights and initiates the formal end-of-tenancy process. Failing to provide proper notice can result in you being liable for an additional month's rent, putting your security deposit at risk before you've even started packing.

In BC, for a standard month-to-month tenancy, you must give at least one full calendar month's notice. This means if you want to move out on the last day of April, your landlord must receive your written notice on or before March 31st. Your lease agreement is the primary source of truth, so review it carefully for any specific clauses regarding how notice must be delivered. A 2024 analysis by Zumper of rental trends showed that with rising rental costs across Canada, losing a month's rent due to improper notice is an increasingly significant financial blow for tenants.
How to Give Notice Correctly
To ensure your notice is legally valid and accepted without issue, follow these key steps:
- Put it in Writing: Verbal notice is not enough. Your notice must be a physical or digital document.
- Include Key Details: Ensure the notice contains your name, the rental unit address, the date you are writing it, and the specific date you will be vacating the property.
- Sign and Date: Always sign and date the notice document.
- Provide a Forwarding Address: While not mandatory at this stage, including your new forwarding address gives the landlord the information needed to return your security deposit.
- Keep Proof of Delivery: Send your notice via a method that provides proof it was received. This could be registered mail, email (if your lease allows and you get a confirmation receipt), or hand-delivering it and asking your landlord for a signed copy. Always keep a copy of the notice and the delivery proof for your records.
2. Deep Clean the Entire Property
After giving notice, the next crucial step in your tenant move out checklist is to thoroughly deep clean the entire rental property. In British Columbia, the Residential Tenancy Act requires tenants to leave the unit in a state of "reasonably clean," a standard that can be subjective. It's generally interpreted as returning it to the condition documented in the move-in Condition Inspection Report, minus normal wear and tear. A surface-level wipe-down won't suffice; this is about a comprehensive clean that demonstrates you've respected the property, which is vital for securing your full security deposit refund.

This process goes far beyond your regular housekeeping. It means tackling areas often overlooked, such as inside all appliances, behind the fridge and stove, scrubbing baseboards, and washing windows. High-traffic areas like kitchens and bathrooms demand special attention to remove built-up grime and soap scum. Failing to meet this standard can lead to your landlord hiring professional cleaners and deducting the cost directly from your deposit—a common cause of disputes according to the RTB's annual reports.
How to Execute a Proper Deep Clean
To ensure your cleaning efforts meet your landlord's expectations and protect your deposit, follow this systematic approach:
- Create a Room-by-Room Checklist: Work through the property one room at a time. This prevents feeling overwhelmed and ensures nothing is missed.
- Focus on Kitchen and Bathrooms: These areas are scrutinized the most. Clean the inside and outside of the oven, degrease the stovetop and range hood, empty and sanitize the refrigerator, and scrub sinks, toilets, showers, and grout until they shine.
- Don't Forget the Details: Dust and wipe down all surfaces, including light fixtures, ceiling fans, window sills, baseboards, and door frames. Clean inside all cabinets and closets after you've emptied them.
- Address Flooring Correctly: Vacuum all carpets thoroughly. If your lease requires it or if stains have occurred, hire a professional carpet cleaner and keep the receipt as proof for your landlord. Mop all hard-surface floors.
- Keep Receipts: If you hire any professional services, such as for carpets or windows, hold onto the receipts. This documentation is valuable evidence in case of a dispute over cleaning charges.
3. Document Property Condition with Photos and Videos
Once the property is completely empty and clean, the next critical step in any tenant move out checklist is to create thorough visual documentation. Taking detailed photos and videos of the unit's final condition serves as your irrefutable proof against any potential unfair damage claims. This evidence is your primary line of defence in a security deposit dispute, showing you left the property in the same or better condition, accounting for normal wear and tear.
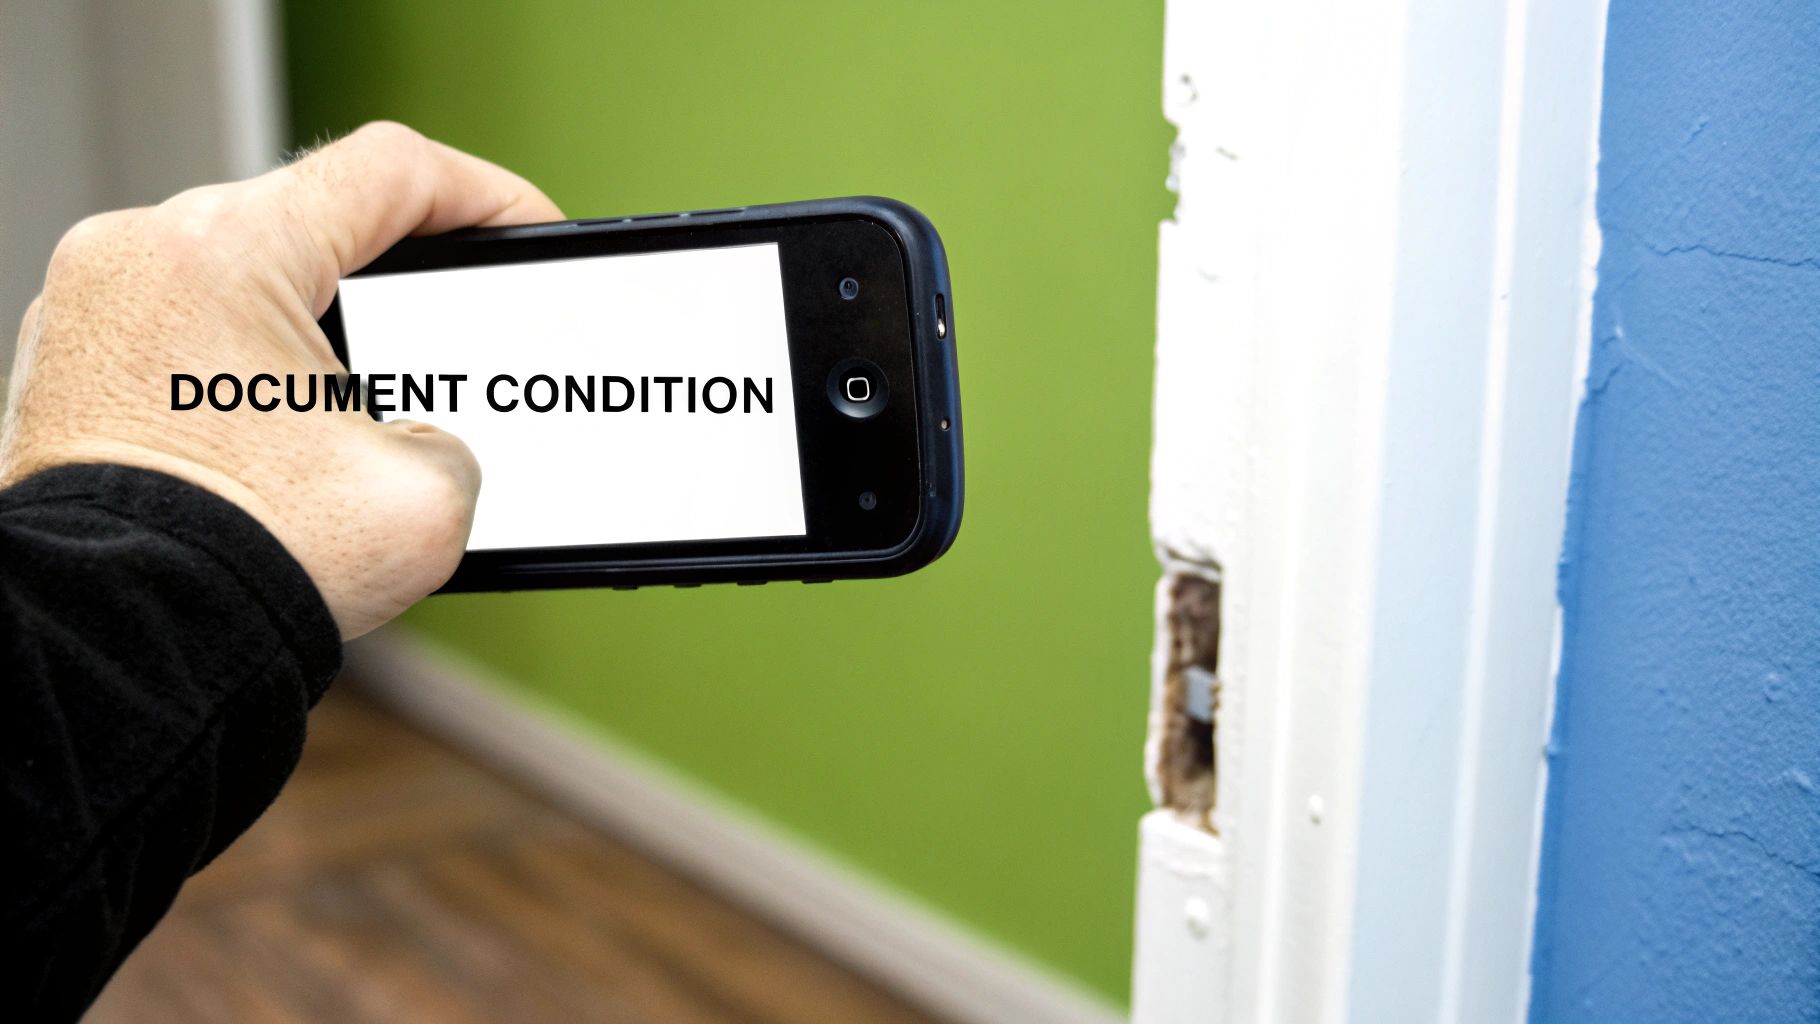
This step protects both you and the landlord by creating a clear, time-stamped record. It provides a definitive "after" picture to compare with the "before" photos from your initial move-in inspection. In the event of a disagreement, this visual evidence can be presented to the Residential Tenancy Branch (RTB) to support your case. A recent CBC News article highlighted how tenants who provided detailed photo evidence were more successful in resolving deposit disputes quickly and in their favour.
How to Document Correctly
To ensure your visual evidence is compelling and useful, a systematic approach is key.
- Time-Stamp Your Evidence: A powerful technique is to include a current newspaper or show the date on a smartphone screen in some of your initial photos or at the start of your video. This validates when the documentation was created.
- Capture Everything: Go room by room. Take wide shots to show the overall condition and then close-ups of specific areas like appliances, countertops, flooring, and walls. Don't forget to open and document the inside of cabinets, closets, the oven, and the refrigerator.
- Use Good Lighting: Open all blinds and turn on all lights to ensure your photos and videos are clear and bright. Use your phone's flash for any dark corners or closets.
- Narrate Your Video: While recording a video walkthrough, verbally describe what you are filming. For example, say "This is the living room wall, no scuffs or marks," or "Showing the inside of the oven, it is now clean."
- Backup Your Files: Immediately after documenting, email the files to yourself, upload them to a cloud service like Google Drive or Dropbox, and keep a copy on your device. This ensures you have multiple copies safely stored and accessible.
4. Complete Necessary Repairs and Touch-ups
Once you've decluttered, the next critical step in a successful tenant move out checklist is addressing any minor damages that go beyond normal wear and tear. This is your opportunity to proactively fix issues that could otherwise lead to deductions from your security deposit. Handling these repairs yourself ensures they are done to a satisfactory standard and often costs less than what a landlord might charge for the same work.
In British Columbia, the Residential Tenancy Branch (RTB) distinguishes between "normal wear and tear" (like minor scuffs or faded paint) and "tenant-caused damage" (like large holes in walls or a broken window). You are responsible for the latter. The RTB's Policy Guideline #1 clarifies these definitions, stating for instance that a few small nail holes might be wear and tear, but dozens of holes or large anchors are considered damage. Taking the time to patch and paint nail holes, fix a cracked light switch plate, or touch up significant scuff marks can make a huge difference in the final inspection.
How to Handle Repairs Effectively
To ensure your repairs are accepted and help secure your full deposit return, follow these practical steps:
- Understand the Standard: Familiarize yourself with what constitutes "normal wear and tear" versus "damage" in BC. The RTB provides guidelines that can clarify your responsibilities. You can find useful information by exploring various landlord and tenant resources online.
- Use the Right Materials: Ask your landlord for the exact paint colour codes used in the unit. If they don't have them, take a small chip of paint to a hardware store for a precise colour match.
- Document Everything: Take clear "before" and "after" photos of every repair you complete. This creates a visual record of your efforts to return the property to its original condition.
- Focus on the Obvious: Prioritize visible issues like nail holes from hanging pictures, deep scratches on walls, or broken fixture covers. These are the items most likely to be flagged during the move-out inspection.
5. Return All Keys, Access Cards, and Property Items
The final step in officially transferring possession of the unit back to your landlord is returning all items they provided. This crucial part of any tenant move out checklist includes more than just the front door key; it covers every single item that grants access or belongs to the property. Failing to return everything can lead to deductions from your security deposit for re-keying locks or replacing expensive items like garage remotes or security fobs.

This process officially ends your responsibility for the rental unit. Once the keys are handed over, you no longer have the right to enter the property. Ensure you have completely moved out all of your belongings before this final handover. According to Section 37 of the RTA, a tenant must "give the landlord all the keys or other means of access that are in the possession or control of the tenant." This includes all house and apartment keys, mailbox keys, garage door openers, access cards for amenities like a pool or gym, and any parking permits.
How to Ensure a Complete Handover
To avoid any disputes or charges, a systematic approach is best. Referencing your original move-in inspection report can help you create a comprehensive list of all items that need to be returned.
- Create a Checklist: Before your move-out day, list every item you received from the landlord at the beginning of your tenancy.
- Gather All Copies: Check with all household members to ensure you have collected every copy of every key and access device.
- Get a Written Receipt: When you hand over the items, ask your landlord or property manager for a signed and dated receipt confirming what was returned. This is your proof that you fulfilled your obligation.
- Hand-Deliver Directly: Whenever possible, return the items in person rather than leaving them in the unit. This prevents them from getting lost and allows you to get immediate confirmation of receipt.
6. Cancel or Transfer All Utilities and Services
An often-overlooked task in a tenant move out checklist is managing your utilities and services. Properly cancelling or transferring these accounts is crucial to avoid paying for services you're no longer using and to prevent any service gaps at your new home. This step involves systematically contacting every provider linked to your rental unit, from electricity and gas to internet and cable, to schedule the end of your service. Forgetting this can lead to surprise bills for the next tenant's usage, creating a financial headache long after you've moved.
Timing is everything. You should schedule disconnections for the day after your official move-out date. This ensures you have power and water for final cleaning and the move itself but aren't charged beyond your tenancy. A 2023 survey by moving industry analysts found that nearly 20% of movers forgot to handle utility transfers in a timely manner, resulting in unnecessary costs or service delays. Start this process at least two to three weeks before your move, as some providers require advance notice.
How to Manage Your Utilities Correctly
To ensure a smooth transition and avoid unexpected charges, follow these key steps:
- Create a Master List: Compile a list of all your utility and service providers, including electricity (e.g., BC Hydro), natural gas (e.g., FortisBC), internet, cable, and any other subscriptions like home security or lawn care. Include account numbers and contact information.
- Schedule in Advance: Contact each provider to schedule a service disconnection or transfer. For transfers, book the installation at your new address well before you arrive. For cancellations, request a final meter reading on your last day of responsibility.
- Keep Confirmation Details: For every call or online request, save the confirmation number, date, and the name of the representative you spoke with. This is your proof if any billing disputes arise later.
- Provide a Forwarding Address: Ensure every provider has your new mailing address. This is essential for receiving your final bill, which you should review carefully for accuracy.
- Update All Accounts: Beyond utilities, remember to update your address with banks, subscription boxes, and online retailers to prevent mail from being sent to your old home.
For those navigating the rental market, understanding these responsibilities is key. Learn more about the comprehensive support available for tenants through professional residential services.
7. Provide Proper Written Notice
The first, non-negotiable step in any successful tenant move out checklist is providing your landlord with formal, written notice. This isn't just a courtesy; it's a legal requirement under British Columbia's Residential Tenancy Act that protects your rights and initiates the formal end-of-tenancy process. Failing to provide proper notice can result in you being liable for an additional month's rent, putting your security deposit at risk before you've even started packing.
In BC, for a standard month-to-month tenancy, you must give at least one full calendar month's notice. This means if you want to move out on the last day of April, your landlord must receive your written notice on or before March 31st. Your lease agreement is the primary source of truth, so review it carefully for any specific clauses regarding how notice must be delivered.
How to Give Notice Correctly
To ensure your notice is legally valid and accepted without issue, follow these key steps:
- Put it in Writing: Verbal notice is not enough. Your notice must be a physical or digital document.
- Include Key Details: Ensure the notice contains your name, the rental unit address, the date you are writing it, and the specific date you will be vacating the property.
- Sign and Date: Always sign and date the notice document.
- Provide a Forwarding Address: While not mandatory at this stage, including your new forwarding address gives the landlord the information needed to return your security deposit.
- Keep Proof of Delivery: Send your notice via a method that provides proof it was received. This could be registered mail, email (if your lease allows and you get a confirmation receipt), or hand-delivering it and asking your landlord for a signed copy. Always keep a copy of the notice and the delivery proof for your records.
8. Update Address with All Important Parties
Once you've sorted out the logistics of the move itself, a critical step in your tenant move out checklist is updating your address with all essential organizations. This administrative task is vital for preventing missed mail, avoiding service interruptions, and protecting your identity. Failing to update your address can lead to sensitive documents like bank statements or government notices being sent to your old home. According to the Canadian Anti-Fraud Centre, mail theft remains a common tactic for identity fraud, making this step a crucial security measure.
Start by setting up Mail Forwarding with Canada Post as a safety net to catch any mail you miss, but don't rely on it as a permanent solution. Systematically go through your contacts and accounts to ensure a seamless transition. This includes not only financial institutions and government agencies like the Canada Revenue Agency (CRA) and your provincial health service but also your employer's HR department to ensure your T4 and other payroll documents are sent to the correct location.
How to Systematically Update Your Address
To ensure a smooth and comprehensive update process, follow these strategic steps:
- Create a Master List: Before you start, create a comprehensive checklist of every service, account, and subscription you have. Categorize them into groups like Financial, Government, Employment, Subscriptions, and Personal.
- Prioritize Digital Updates: Many services, from banking to streaming platforms, allow you to update your address instantly online. Tackle these first for immediate effect.
- Notify Government Agencies: Update your address with the CRA, Elections Canada, and your provincial service provider for your driver’s licence and health card.
- Inform Financial Institutions: Contact all your banks, credit card companies, investment firms, and any loan providers.
- Don't Forget Subscriptions: Update your address for any magazine subscriptions, meal kit deliveries, or online retailers you frequent to prevent packages from going astray.
- Update Emergency Contacts: Ensure your employer, as well as family and friends, have your new address and contact information for any emergencies.
Tenant Move-Out Tasks Comparison
ItemImplementation Complexity 🔄Resource Requirements ⚡Expected Outcomes 📊Ideal Use Cases 💡Key Advantages ⭐Schedule Pre-Move-Out Inspection with LandlordMedium – coordination with landlord neededLow – mainly time and communicationEarly identification of issues, fewer disputesTenants wanting to maximize deposit returnReduces surprises, builds good relationsDeep Clean the Entire PropertyHigh – thorough, time-intensive cleaningMedium to High – may require professionalsProperty restored to move-in conditionEnd of tenancy requiring spotless cleanEssential for deposit return, strong impressionDocument Property Condition with Photos and VideosMedium – needs thorough coverage and good documentationLow – camera/phone, storage spaceStrong evidence for disputes, faster deposit returnWhen legal protection or proof neededObjective, inexpensive, quick to createComplete Necessary Repairs and Touch-upsMedium to High – skill and materials requiredMedium – repair tools and suppliesReduces deposit deductions, maintains property valueMinor damages beyond normal wearCost-effective vs landlord repairs, control qualityReturn All Keys, Access Cards, and Property ItemsLow – task-focused but requires thoroughnessLow – just organization and documentationOfficial end of tenancy, avoids extra chargesLast step before move-outPrevents fees, ends obligationsCancel or Transfer All Utilities and ServicesMedium – involves coordination with multiple providersLow to Medium – time and communicationStops billing, ensures service continuityMove-out day and new residence provisionsAvoids overcharges, ensures smooth transitionProvide Proper Written NoticeLow – procedural, requires specific formatLow – documentation and deliveryLegal coverage, establishes tenancy endLease-required advance notificationProtects tenant rights, planning timeUpdate Address with All Important PartiesMedium to High – involves many contactsLow to Medium – time-consumingContinuity of services, prevents identity issuesAfter move-out mailing and service continuityEnsures mail receipt, avoids identity theft
Final Steps for a Smooth Handover
Successfully navigating the end of a tenancy is more than just packing boxes; it is about protecting your financial interests and ensuring a seamless transition. By diligently following this tenant move out checklist, you have transformed a potentially stressful process into a series of manageable, strategic actions. From providing proper written notice to documenting the property's final condition, each step is a crucial piece of the puzzle.
The most powerful tools at your disposal are clear communication and thorough documentation. Your move-in inspection report, paired with detailed move-out photos and videos, creates an undeniable record of your tenancy. This evidence is your strongest asset, particularly when it comes to securing your security deposit. Remember, in British Columbia, the Residential Tenancy Act outlines specific timelines and procedures. A 2023 report from the Tenant Resource & Advisory Centre highlighted that disputes over security deposits remain one of the most common issues, underscoring the importance of being prepared. Knowing your rights and having your documentation organised puts you in a position of strength.
Ultimately, mastering your move-out responsibilities is about more than just getting your deposit back. It preserves your rental history, fosters a positive relationship with your landlord, and paves the way for a stress-free start in your new home. By leaving the property in excellent condition and finalising all administrative tasks like utility transfers and key returns, you close this chapter on a positive and professional note. This careful planning ensures your focus can shift entirely to the excitement of settling into your next home.
Whether you are a tenant seeking a well-managed property or a landlord looking for expert guidance on processes like this tenant move out checklist, professional support is invaluable. The team at Royal LePage Brookside Realty offers comprehensive property management services, ensuring all aspects of the rental process are handled with clarity and fairness. Explore how their expertise can benefit you by visiting Royal LePage Brookside Realty.